Table of Contents
Quick start guide
This document describes how to begin using the ZSOM-Control ant ZSOM-Mini.
What do You need to Get Started
Installing Software on the Host Computer
Before using the ZSOM, you must install the following application software and device drivers on the host computer.
| Software |
|---|
| LabVIEW 2017 SP1 or later (See also thecompatibility information from NI ) |
| LabVIEW Real-Time Module 2017 or later |
| LabVIEW FPGA Module 2017 or later 1) |
| NI CompactRIO Device Drivers 17.6 .. current (see copatibility chart to check which version of CompactRIO device drivers works on your LabVIEW version |
| ZSOM SDK see downloads (login required) see also upgrade SDK |
Connecting the ZSOM
Connect the Power Supply


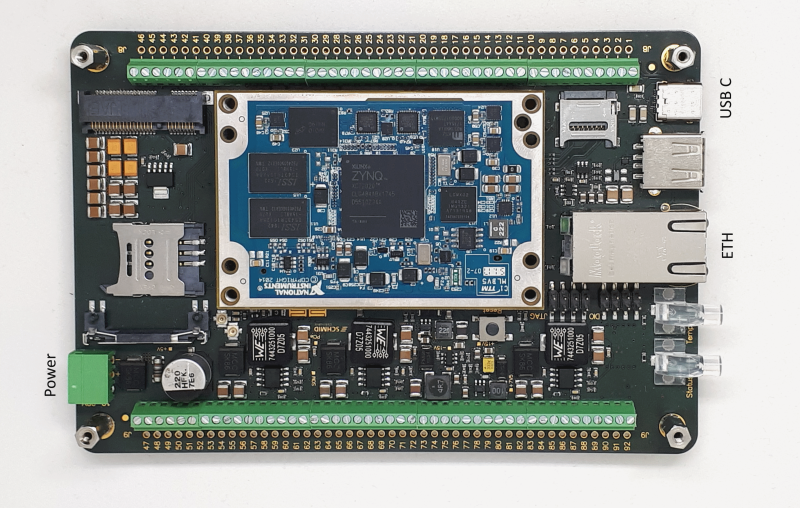
Connect the ZSOM Plug with the delivered power supply. The Input voltage rating is 9-28 VDC, 1 A max.
The Status LED stays solid during boot and will turn off after boot
Connect the Network
USB C
- Device drivers are installed automatically
Windows7 success message
Ethernet
If you prefer connecting the device to your Network, use the RJ45 "ETH" connector.
Installing Sofware on the ZSOM
The ZSOM-Control-Starterkit ships with installed Software and is ready to go. It si most likely, that your Installation does not match the software versions on the taregt. In that case, (Labview tells you when you want to deploy an application) use NI-MAX to install the maching software packages on the Target. If you want to deploy or retrieve your own image refer to Installing Software on ZSOM
Using the ZSOM Example Projects
The ecamples are installed with the SDK and can be foud via NI Example finder
The FPGA bitfiles are precompiled and enable for use without LabVIEW FPGA. The examples are built for a generic use of the board. They can be used as starting point for a customized application.
Establish Connection
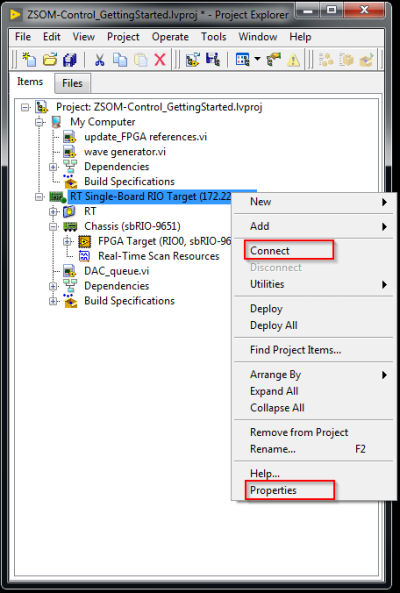
- Set IP to discovered address (ZSOM connected through USB C will have the IP “172.22.11.2”)
- Right-click on Realtime Target → Properties
- Connect
- Right-click on Realtime Target → Connenct
- Realtime Target icon on project explorer shows a light green dot on success
Explore the Fun!
Open the “RT” Folder and the vi “RT_main.vi” and run it.


